
With our step-by-step guide, setting up your Outlook Email with Skynet Solutions Email Hosting is quick and easy. Follow the steps below to begin receiving email to your desktop computer.
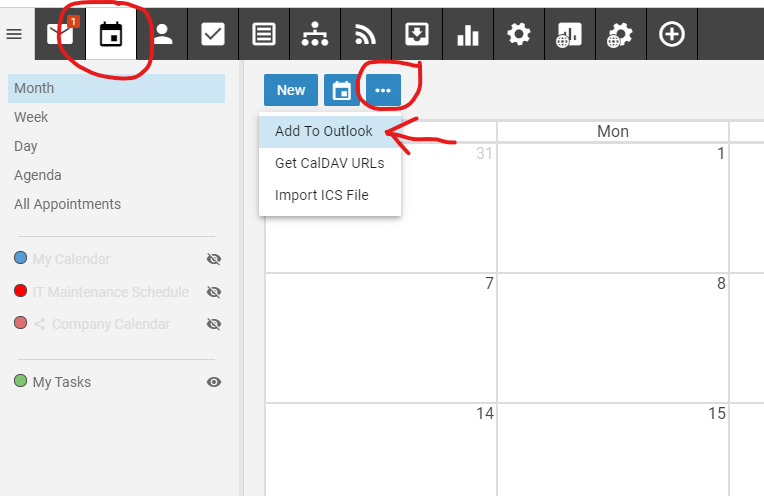
1. Load Smartermail in the browser and click the Calendar Icon at the top.
2. Click the Three dots circled in the below picture.
3. Click on Add to Outlook
1. Start Outlook.
2. On the File menu, click Info and click Account Settings.
3. Select Account Settings from the list.
4. On the E-mail tab, click New and Select Email Account, and then click Next
5. Click to select the Manually configure server settings or additional server types check box, and then click Next.
6. Click Internet E-Mail, and then click Next.
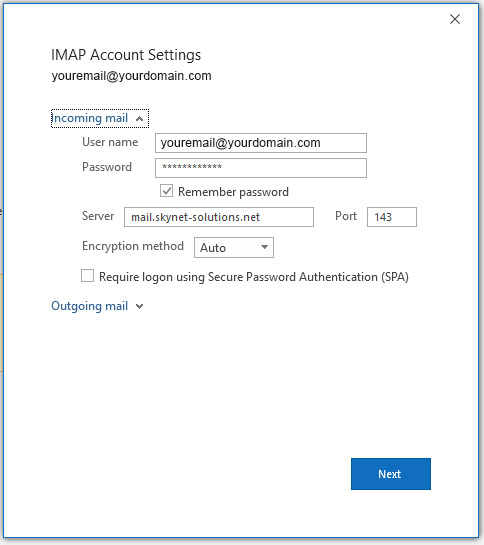
7. In the Server Information section, select IMAP for Account Type.
8. In the Your Name box, enter your name exactly as you want it to appear to recipients.
9. In the Email Address box, type your email address.
10. In the User Name box, type your email address.
11. In the Password box, type your password.
12. In the Incoming mail server box, type mail.skynet-solutions.net.
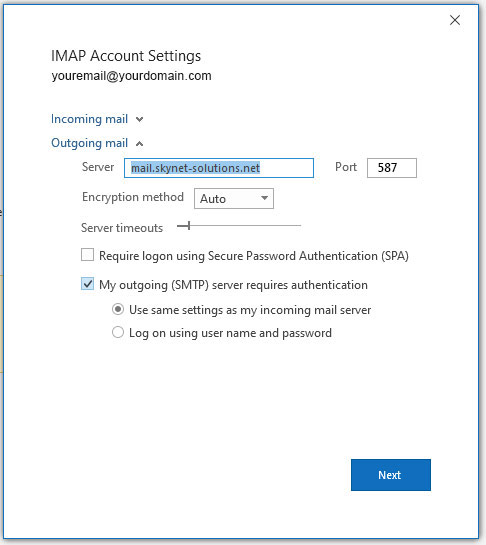
13. In the Outgoing mail server (SMTP) box, type mail.skynet-solutions.net.
14. Click the More Settings Button
15. Select the Outgoing Server Tab
16. Check “My outgoing server (SMTP) requires authentication”
17. Select “Use same settings as my incoming mail server”
18. Select the Advanced Tab
19. Incoming Server (IMAP) is 143
20. Outgoing Server (SMTP) is 587
21. Both “Use the following type of encrypted connection:” should be set to none
22. Click OK
23. Click Next after you have completed entering this configuration information
24. After the test is complete click Close, and then click Finish.