Categories
Support Technology

Whitelist an Email in SmarterMail Using Trusted Senders

If you’re expecting an important email but can’t find it in your Inbox, there’s a chance it was identified as spam and delivered to your Junk Email folder.

Spam filtering is an important part of protecting your email account from unwanted and potentially malicious messages. Occasionally, however, a legitimate message may be incorrectly identified as spam. Regularly reviewing the contents of your junk mail folder should be completed weekly.

Skynet Solutions uses SmarterMail Enterprise by SmarterTools for our hosted email platform. SmarterMail provides a feature called Trusted Senders that allows you to identify email addresses you trust.

If you’re familiar with the term “whitelisting,” this is essentially what you’ll be doing. In SmarterMail, the feature is referred to as Trust Sender and the addresses you trust are maintained in your Trusted Senders list.

In this guide, we’ll show you how to locate a legitimate email in your Junk Email folder, trust the sender, move the message back to your Inbox, and manage your Trusted Senders list.

Before You Trust a Sender

Before adding an email address to your Trusted Senders list, make sure you recognize the sender and are confident that the message is legitimate.

Do not trust a sender simply because the name or email address displayed on a message looks familiar. The “From” address of an email can potentially be spoofed, and phishing messages are often designed to appear as though they came from a legitimate company, coworker, customer, or service.

Be especially cautious if an unexpected message asks you to:

  • Click a link to sign in or verify your account
  • Open or download an unexpected attachment
  • Provide a password or other sensitive information
  • Send or change payment information
  • Purchase gift cards or transfer money
  • Take an urgent action you weren’t expecting

If you’re unsure whether a message is legitimate, contact the sender through a method you already trust before adding the address to your Trusted Senders list.

Step 1: Log In to SmarterMail Webmail

Start by signing in to your Skynet Solutions SmarterMail webmail account using your normal webmail login.

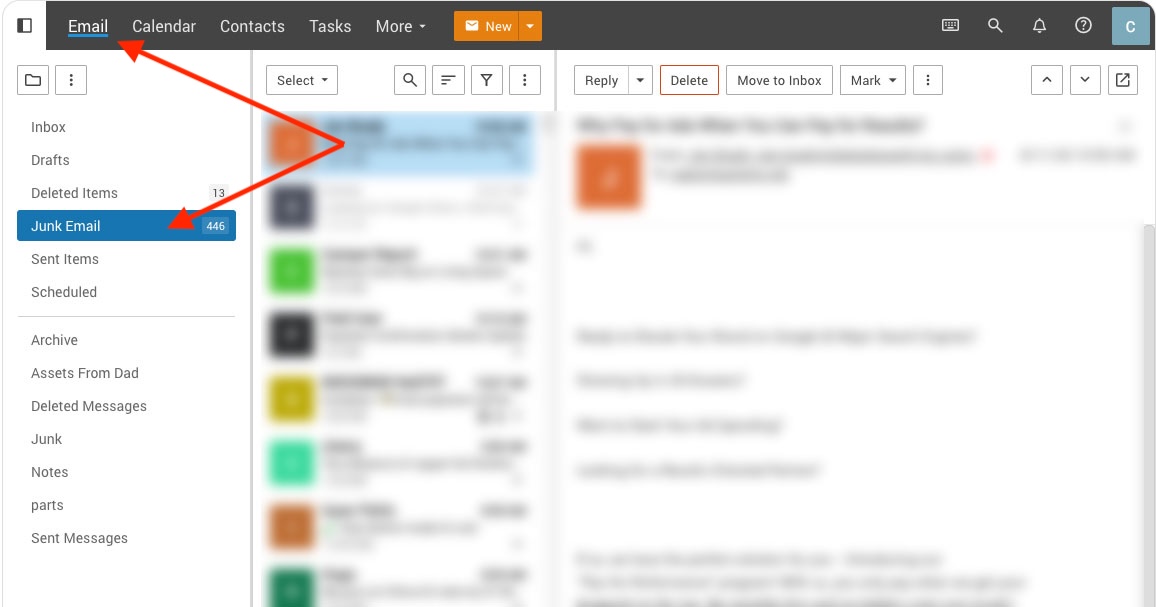
After signing in, select Email to open your mailbox.

You should see your email folders along with the messages contained in your mailbox.

Step 2: Open Your Junk Email Folder

From your list of email folders, locate and open the Junk Email folder.

Junk Email

SmarterMail places messages that meet certain spam-filtering criteria into this folder based on the spam filtering policies applied to your account and domain.

Find the legitimate message that was incorrectly classified as spam.

Before continuing, take a moment to confirm:

  • You recognize the sender.
  • The sender’s email address is what you expected.
  • The subject and content of the message make sense.
  • You were expecting the message or otherwise know why it was sent.

Once you’re confident the message is legitimate, you can add its sender to your Trusted Senders list.


Step 3: Trust the Sender

With the legitimate message located in your Junk Email folder, you can tell SmarterMail that you trust email from that sender.

1. Select the Message

Click the email to open it, or select the message from the message list.

Make sure you’ve selected the correct message before continuing. The email address associated with that message is the address you’ll be telling SmarterMail to trust.

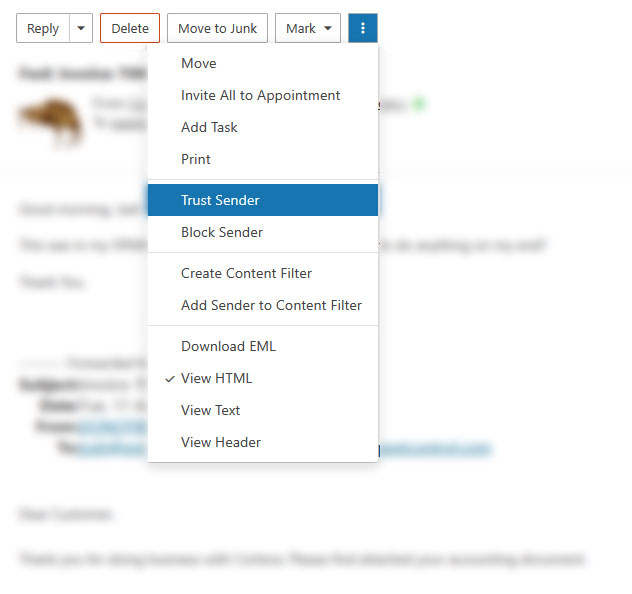
2. Locate the Message Actions

With the message selected or open, look at the available message actions in the SmarterMail toolbar.

Depending on your version of SmarterMail, browser window size, and device, some actions may be displayed directly on the toolbar while additional actions may be available from the Actions or More (…) menu.

3. Select “Trust Sender”

Locate and select Trust Sender from the available message actions.

Trust Sender

This tells SmarterMail that you consider messages from that email address legitimate.

SmarterMail will add the sender’s email address to your personal Trusted Senders list.

4. Confirm the Correct Sender

Pay attention to the email address you’re trusting rather than relying only on the sender’s display name.

For example, a message might display: ABC Company Billing

but the actual email address could be: billing@example.com

It is the email address—not simply the displayed name—that is important when deciding whether a sender should be trusted.

Step 4: Move the Existing Message to Your Inbox

Trusting the sender is intended to help SmarterMail handle future messages from that sender appropriately.

The message that was already placed in your Junk Email folder may still need to be moved manually.

Select the message and use SmarterMail’s Move option to move it to your Inbox or another appropriate mail folder.

You can then read, reply to, forward, or otherwise work with the message normally.

Step 5: Verify the Address in Your Trusted Senders List

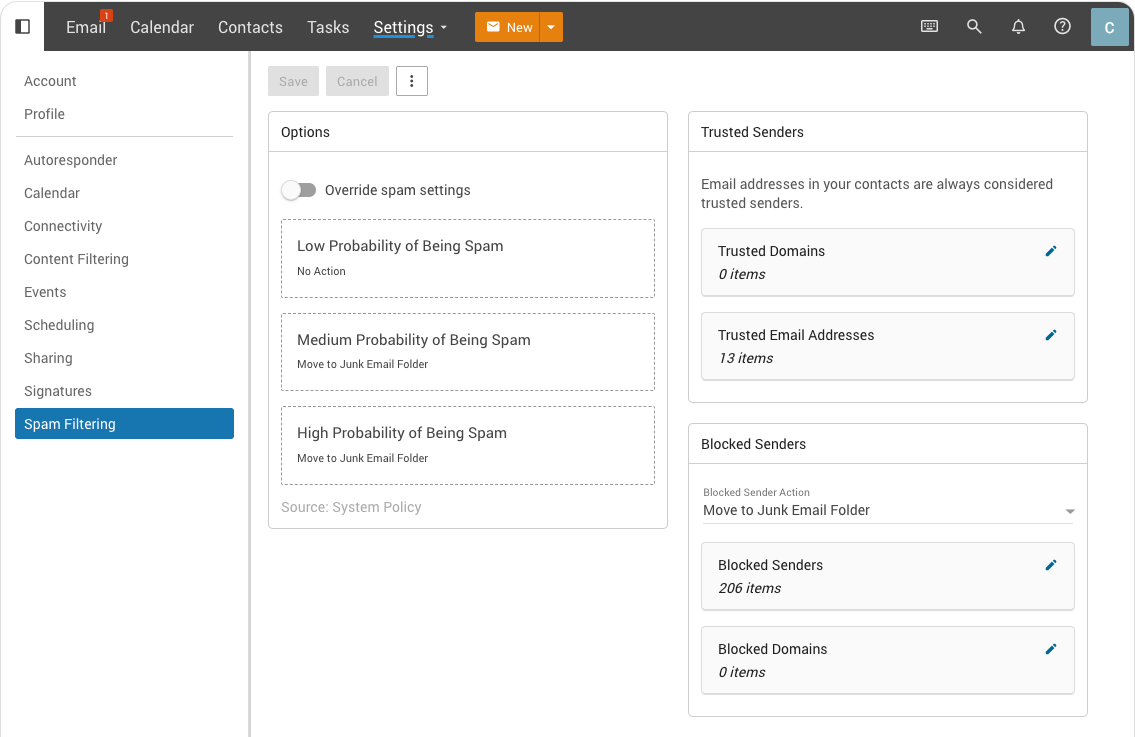
If you’d like to make sure the email address was successfully added, you can review your Trusted Senders list from within SmarterMail.

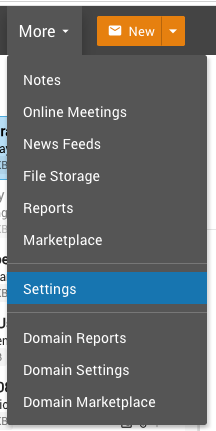
Open Settings in the SmarterMail interface and navigate to your Spam Filtering settings. This could be under the “More” button (More > Settings > Spam Filtering).

more-settings

Locate the Trusted Senders section. Click the edit icon to view the sections.

The email address you trusted should now appear in this list.

Spam Settings

This area is also useful if you want to review addresses you’ve previously trusted or remove an address that should no longer be trusted.


Adding a Trusted Sender Manually

You don’t have to wait for a message to appear in your Junk Email folder before adding a sender to your Trusted Senders list.

If you already know an email address that should be trusted, you can add it manually.

Open your Settings, navigate to your Spam Filtering settings, and locate the Trusted Senders section.

You can enter a specific email address, such as: billing@example.com

SmarterMail also allows a domain to be added as a trusted sender, such as: example.com

When entering multiple addresses or domains, place each entry on its own line.

SmarterMail does not support wildcards in the Trusted Senders list.

Should You Trust an Email Address or an Entire Domain?

Whenever possible, we recommend trusting a specific email address rather than an entire domain.

For example, suppose you need to receive automated notifications from: notifications@example.com

Adding that specific address trusts the sender you know and expect.

Adding: example.com

is broader because it applies to email coming from addresses throughout that domain.

There are situations where trusting an entire domain makes sense. For example, your business may regularly communicate with many different employees at a trusted partner organization.

However, domain-level Trusted Sender entries should be used more selectively. For most individual users, trusting the specific email address they need is the better choice.

What Does “Trust Sender” Actually Do?

When you select Trust Sender, SmarterMail adds the email address to your personal Trusted Senders list.

Messages from addresses on this list are exempted from most spam-filtering checks that could otherwise cause legitimate messages to be classified as spam.

There is an important distinction, however:

Trusting a sender does not disable all of SmarterMail’s email security protections.

SmarterMail can continue performing email authentication checks such as SPF, DKIM, and DMARC.

These technologies help determine whether the server delivering a message is actually authorized to send email for the address or domain it claims to represent.

This provides an important layer of protection against email spoofing.

Think of the Trusted Senders feature as telling SmarterMail:

“I regularly receive legitimate email from this address.”

It does not mean: “Automatically assume every message claiming to be from this address is safe.”

That distinction allows Trusted Senders to help reduce false-positive spam filtering without unnecessarily eliminating important email authentication protections.

Removing an Address from Trusted Senders

If you accidentally trust the wrong email address—or simply no longer want an address to be treated as trusted—you can remove it.

Open Settings in SmarterMail and return to your Spam Filtering settings.

Locate the Trusted Senders section and find the email address or domain you want to remove.

Remove the entry and save your changes if prompted.

Future messages from that sender will once again be processed according to the normal spam filtering rules applied to your mailbox.

What If a Trusted Sender Still Goes to Junk Email?

Adding an address to your Trusted Senders list can resolve many false-positive spam issues, but it does not guarantee that every future message claiming to come from that address will automatically reach your Inbox.

If messages from a Trusted Sender continue appearing in Junk Email, there may be another issue affecting message delivery.

For example:

The Sender’s Email Authentication May Be Failing

The sending mail server may have an issue with its SPF, DKIM, or DMARC configuration.

These authentication methods help receiving mail servers verify that a message is legitimately associated with the domain it claims to represent.

The Sender May Be Using a Different Email Address

Businesses and online services frequently use multiple addresses for different types of email.

For example: billing@example.com

and

notifications@example.com

are two different sender addresses.

Trusting one address does not necessarily mean you’ve trusted another address from the same domain.

Check the actual sender address on the new message and compare it with the address in your Trusted Senders list.

The Message May Be Subject to Additional Mail Server Policies

Your mailbox is only one part of the email filtering process.

Depending on your organization’s email configuration, additional spam filtering or security policies may be applied at the domain or server level.

If legitimate messages continue being filtered after you’ve trusted the sender, additional investigation may be necessary.

Don’t Automatically Trust Every Message in Junk Email

The Junk Email folder exists for an important reason.

While false positives can occur, many messages placed in Junk Email are there because SmarterMail identified characteristics commonly associated with spam, spoofing, or unwanted email.

Review each message individually.

A legitimate-looking company logo, familiar sender name, or convincing email design is not enough by itself to establish that a message is safe.

If something about a message seems unusual, verify it before clicking links, opening attachments, replying, or adding the sender to your Trusted Senders list.

SmarterMail Trusted Senders and Spam Filtering Resources

SmarterTools maintains detailed documentation for SmarterMail administrators and users.

For additional information, refer to the following SmarterMail resources:

SmarterMail User Spam Filtering

SmarterTools’ Spam Filtering documentation explains user-level spam filtering settings, including Trusted Senders and Blocked Senders.

https://help.smartertools.com/smartermail/current/topics/user/Settings/MySettings/Filtering/MySpamFiltering

SmarterMail Domain Spam Filtering

Domain administrators can also review SmarterTools’ documentation regarding domain-level spam filtering settings and Trusted Senders.

https://help.smartertools.com/SmarterMail/Current/Topics/DomainAdmin/Settings/DomainSpamFiltering

These resources are maintained by SmarterTools and can provide additional information about the options available in your version of SmarterMail.

Need Help with SmarterMail?

Skynet Solutions provides SmarterMail Enterprise email hosting for businesses that need professional hosted email and webmail services.

If you’re a Skynet Solutions email hosting customer and legitimate messages continue to be delivered to your Junk Email folder after you’ve added the sender to your Trusted Senders list, contact Skynet Solutions Support.

Our support team can help investigate the message and determine whether the issue is related to your mailbox settings, spam filtering, the sending mail server, or the sender’s email authentication configuration.

When contacting support about a filtering issue, do not delete the affected message from your Junk Email folder. Keeping the original message available can provide useful information when troubleshooting why it was classified as spam.

Categories
Business Technology

Video Conferencing and File Sharing with your Hosting Package

All of our Business Hosting Packages include email hosting, which also means that you have access to our provided email software SmarterMail. This provided email software has many features but I would like to concentrate on a few features that you may not be aware of and have complete ability to utilize. Eliminate third-party services and streamline your workflow with these easy-to-use built in Video Conferencing, Screen Sharing, and File Sharing tools.

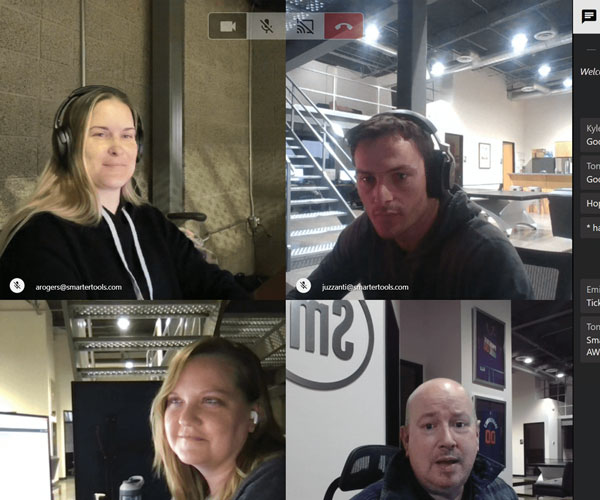
There are plenty of video conferencing options available to choose from these days, however most of them require an account, a download or an app installation just to attend. There is nothing worse than wasting time trying to agree on a video conferencing app that your clients already have, prefer or have used in the past. This is where utilizing the available video conferencing software included with your Skynet Solutions Business Hosting package can shine. Create a meeting space and share a link to your client or viewer within seconds. The link will not require any sign up or download as its browser based and will only require an internet connection. It’s a simple one click process before being presented with very familiar video conferencing controls and interface. See our walk-thru guide here.

Screen Sharing Options

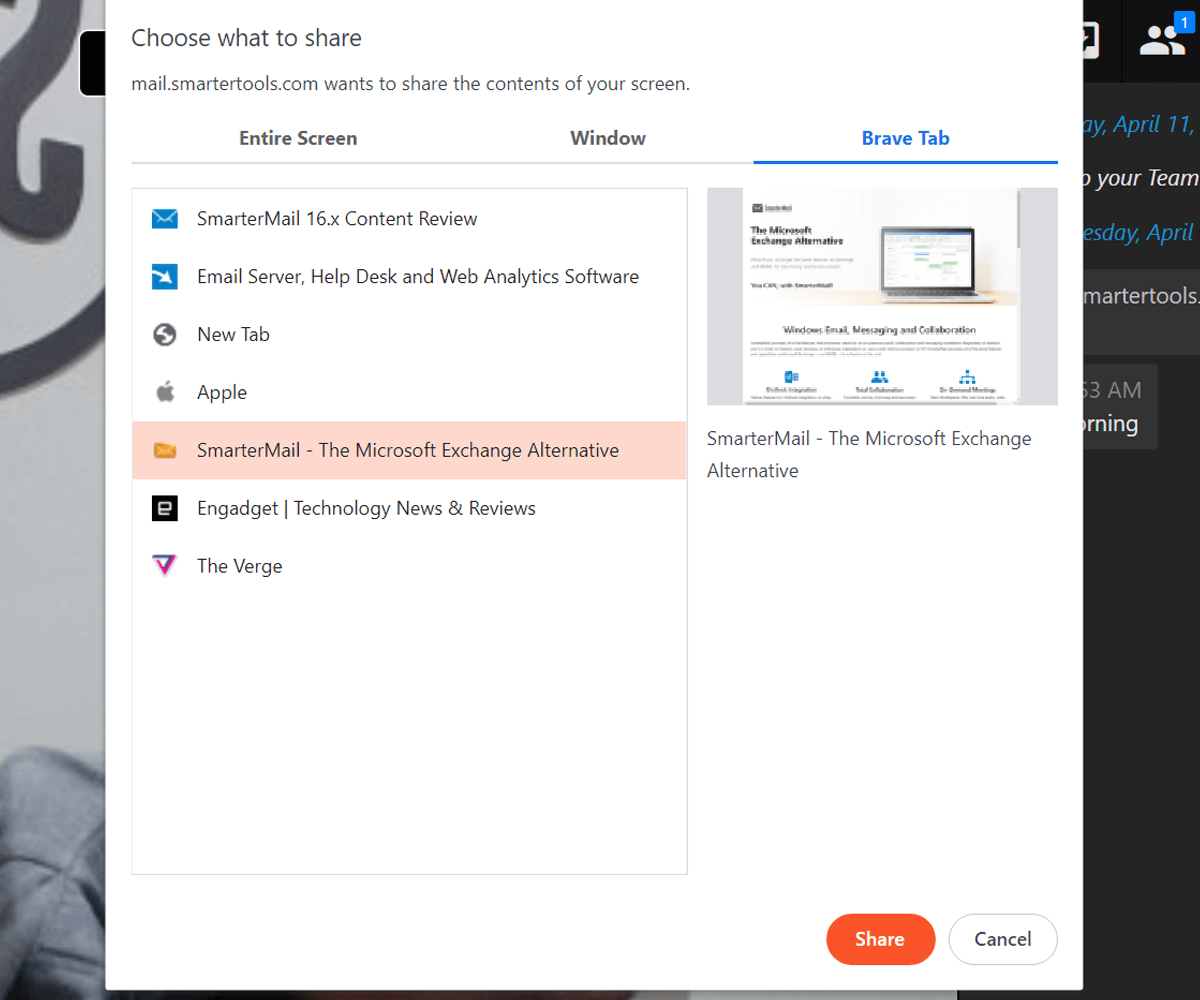
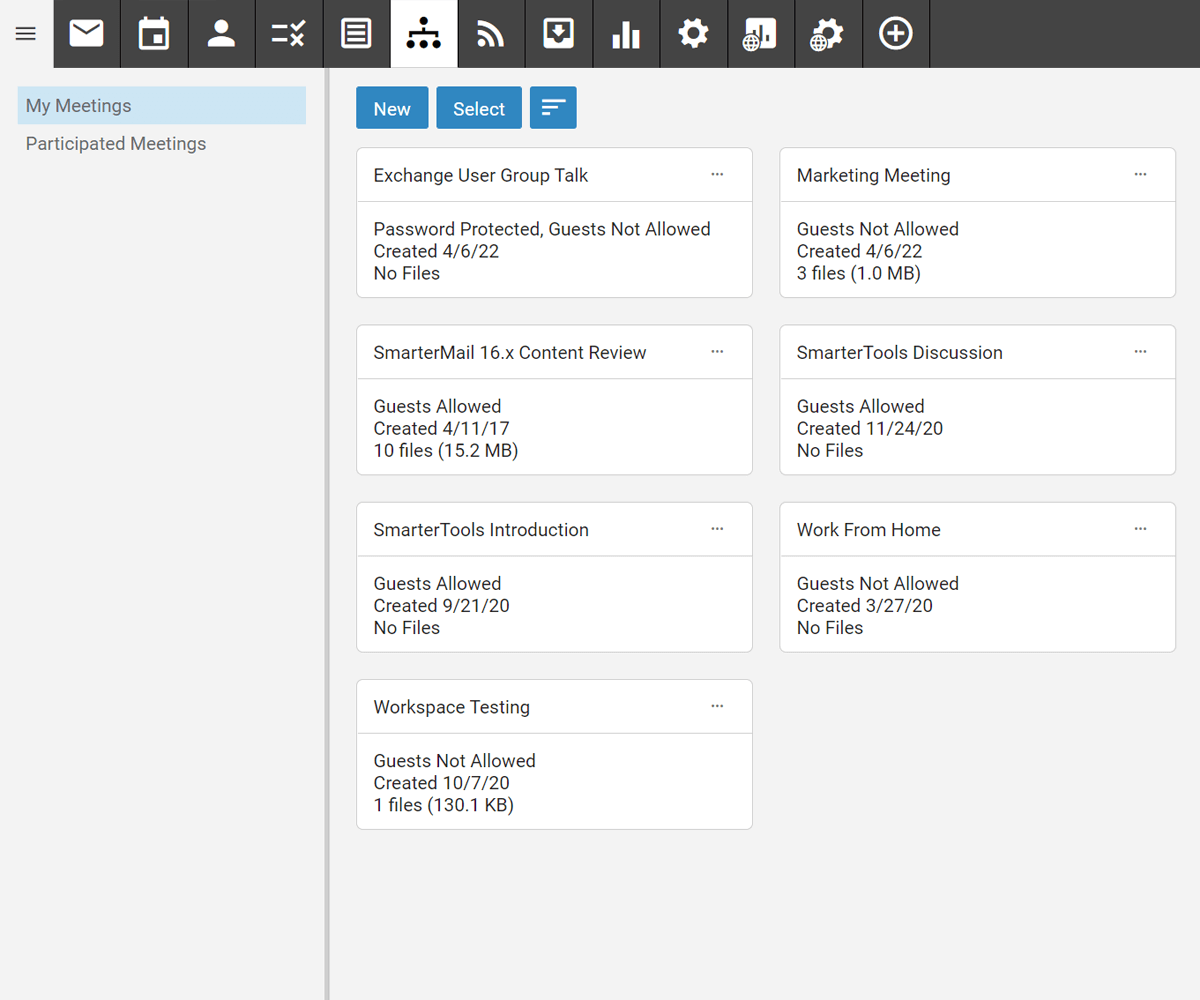
Meeting organizers have typical video conferencing control options like restricting guests, setting permissions, quality settings and password protecting meetings. Organizers and attendees can share their entire screens, specific applications or individual browser tabs during the meeting. Once a meeting workspace has been created it can be used multiple times or used as an ongoing meeting space.

Video Conference Meeting Spaces

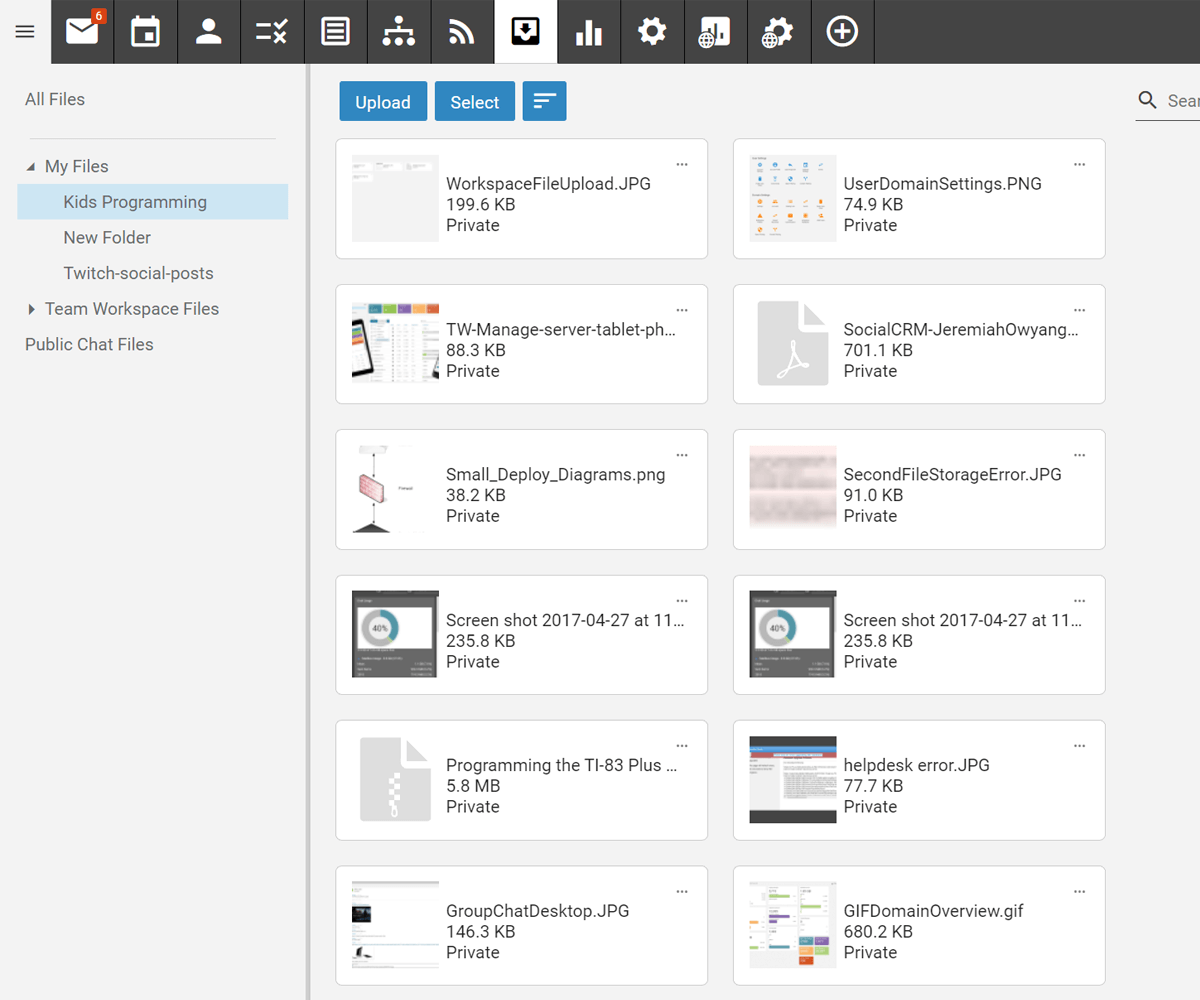
Shared files and file storage are stored in SmartMail’s integrated File Storage area, making it an easy to access and download files even after the meeting has ended. After uploading files to your dedicated storage area you can send a link for download or set a secure password to allow for file downloading.

File Storage

This was just a quick synopsis of two very important and available tools that you might not have been aware of. Please view our walk-thru guide on using these features in the blog article link below.

See our walk-thru guide for using SmarterMail Video Conferencing and File Sharing here:

https://skynetsolutions.com/using-smartermail-team-workspaces/


If you are looking for a web or email host that can be accountable, accessible and reliable then please send us a message or call today!

Categories
Development Technology Website

Shopify or WordPress WooCommerce?

The most common question most people looking to start an e-commerce site is: Which platform do I use? Shopify or WooCommerce?

Choosing the platform is the first and most daunting part of this process. On the flip side there are people currently on one platform and looking to make a switch to another. Skynet Solutions can assist you in either of these situations as well as advise on which platform to use for your business. In this write up I want to explore some reasons why Shopify might be your better bet over a WordPress WooCommerce website.

There are many variables to consider when starting this process. Many of which I might not shed light on, but I hope to touch on some of the more common instances. Shopify, to me, is like the Apple of e-commerce websites; everything is all there inside the walled garden. Unlike WordPress, creating a Shopify store is a fairly streamlined process that doesn’t require a checklist or reliance on previous web experience. Many of the tedious setup items associated with a WordPress WooCommerce website like, Analytics, Credit Card Processing, SSL, Hosting, Security and Design elements are presented to you in a much more simple selection process. You won’t need to hunt down how to do something or realize something should have been done in the beginning with Shopify. All of the standardized e-commerce web store items are available and more easily set up with a Shopify store.

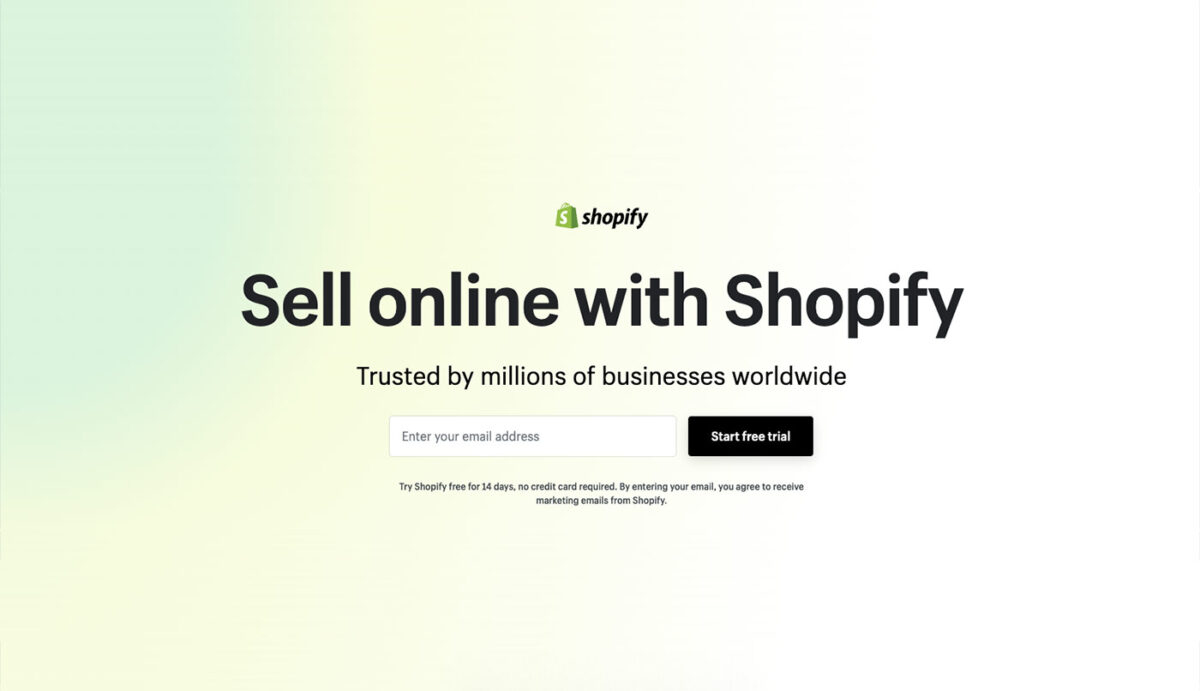
The Shopify platform is designed to help raise you up with built in support and tools. This platform will grow with your business and allow for expansion all while keeping you within industry standards. Start your FREE, no credit card required, account today for 14 days.

Support

Shopify offers live chat support and help within its developer community for advice on how to improve your store. Plenty of people have documented their processes so that you can fully take charge for your next store upgrade.

Integrations

Shopify has many built in integrations that can easily be implemented in your store. Things like email marketing, abandoned cart marketing, Social media and custom applications are all readily available for setup. If you have a brick and mortar store with a POS system Shopify has you covered with their Point-of-sale integration option. With WordPress WooCommerce you will need to find, purchase/sign-up and setup individual providers for each of the items that I mentioned.

Mobile

Shopify works great with mobile in mind. All available designs are built to work out of the box with mobile applications. Now this is the same as WordPress WooCommerce. However, this story changes if you are looking to run your store via a mobile device. Shopify has much better mobile usability when it comes to administrator access.

Hosting and SSL

Hosting and annual SSL certificates are all taken care of under the Shopify umbrella when you sign up. One less stress and additional cost to be concerned with is annual SSL and Hosting renewals as Shopify has these items built into their packages.

Security

Google reCAPTCHA and other standard security measures are automatically included and setup with your Shopify store. Where as each and every one of these items will need to be sourced and setup with a WordPress WooCommerce website.

Choose Skynet Solutions as your Shopify Partner!

Skynet Solutions is a Shopify Partner that can help you setup a new Shopify store or help migrate you from an existing WordPress WooCommerce site. Contact us if you are needing to migrate an existing website or start your new Shopify account with a FREE 14 day trial (no credit card needed) by clicking the link above. Explore the available account options, see how things work and you could even start an initial store mock up.

I’ve reviewed most of the features that Shopify has and how those can help you create a great eCommerce web store. Going this route can be less complicated, more secure and great for mobile and social media. The Shopify process can potentially cost you more than a WordPress WooCommerce store but it might be worth it to you. I hope this helps you to determine your path and we look forward to helping with your journey!

Categories
Business Support Technology

Email Spam and Whitelist Management Processes for Outlook, Yahoo, Gmail & iCloud

Recent updates to email spam filtering has lead to a lot more of unreceived messages for users across the world. Have you recently dealt with this? Out of nowhere you just STOP receiving emails from someone that you have a conversation going with….only reconnect and start the conversation over again weeks later? Messages that you were accustomed to receiving from people, suddenly and unbeknownst to you, end up in the spam folder. This can be frustrating and confusing for both parties and its been a common occurrence lately. Spam and Whitelist Management should be a topic of understanding and normal procedure moving forward.

How do I check my Spam and Whitelist Management?

We have some helpful information below on how to adjust your spam filters and modify your whitelist settings for some of the most popular email clients.

Why are my emails going to Spam or Junk folders all of a sudden?

Email marketing has grown in recent years but not in a completely positive way. More and more scams and fraudulent activity are happening online. Your personal information is being harvested, sold and shared to those looking to bring you curated messages for engagement and advertising purposes. However, this information is also privy to those with nefarious online motives. This advancement has led to tighter restrictions being enforced by the big dogs like: Microsoft (Yahoo & Outlook), iCloud (Apple) and Gmail (Google). Spam and Whitelist Management needs to be something that you look into now.

How do I avoid emails being placed in your Spam or Junk folder?

These three items are the basic steps taken in all of the procedures below. 

1. Add your most commonly communicated email addresses as a “contact” on any of these services. Doing this first step will add these addresses to your Whitelist.

2. Adjust your spam filter settings. This is per email client but once done shouldn’t require any additional maintenance.

3. Regularly Monitor your spam folder. Emails that are placed in your spam or junk folder are typically only held for a few days before being automatically deleted. Checking your spam and junk folder, for each mail client, on a regular basis should be a part of your normal routine. When an email appears in your junk or spam folder that shouldn’t be there you can select that message and mark it as “not spam”. In most cases the email will be immediately removed and placed into the Inbox.


Microsoft OutlookOutlook Email Process

Outlook.com is now the hub for Hotmail, Live Mail and other Microsoft email products. 

Add people to your Safe Senders List via online web version of Outlook:

1. Select the Settings icon (gear icon)
2. Select View all Outlook settings
3. Select Mail
4. Select Junk Mail
5. Enter the sender email address
6. Select Add > Save

Mark an email as “not junk” in Outlook:

1. While in your Outlook folder list select the Junk Email folder and select the emails that shouldn’t be there
2. Right click the desired email and then select Mark as not junk.

Check blocked senders and safe senders list (check your whitelist and blacklist):

1. Select Settings > View all Outlook settings
2. Select Mail, and then select Junk email
3. If your see the senders address listed under the “Blocked senders and domains” select the address and then select Remove > Save

For more information on Outlook email Spam Filtering Settings please visit this Microsoft support pages: https://support.microsoft.com/en-us/office/block-or-allow-junk-email-settings-48c9f6f7-2309-4f95-9a4d-de987e880e46

https://support.microsoft.com/en-us/office/change-the-level-of-protection-in-the-junk-email-filter-e89c12d8-9d61-4320-8c57-d982c8d52f6b


GmailGmail Email Process

On a computer:

1. go to contacts.google.com
2. At the top left corner, select Create Contact
3. Fill out the contact information and be sure to include their sending email address
4. Select Save in the bottom right corner

On an Android mobile device:

1. Open the Contacts app
2. At the bottom right, touch Add
3. Enter the contact name and email address
4. Make sure you save the contact to the correct account. Next to your email account, tap the Down arrow and then select the account that will receive the email messages you’re whitelisting.
5. When you’re finished touch Save

Mark an email as Not Spam:

1. Open the Gmail website: https://mail.google.com
2. On the left select Spam
3. Find and open the desired message
4. At the top of the page select Not Spam

Gmail spam filter rule creation:

1. Open the Gmail website: https://mail.google.com
2. In the search box at the top select the down arrow
3. In the From field and enter the sender email address
4. At the bottom of the search window click the Create filter
5. Select Never send it to Spam
6. Click Create filter

For more information on Gmail Email Spam Filtering Settings please visit this Google support page:

https://support.google.com/a/answer/2368132?hl=en


Yahoo LogoYahoo Email Process

1. Log into your Yahoo mail account, select Contacts icon
2. Select Add a new contact
3. Fill out the contact information and be sure to include their sending email address

Mark email as not spam from mobile device:

1. Log into your Yahoo mail in your mobile devices web browser
2. Touch the Sidebar Menu icon
3. Touch the Spam folder
4. Find and select the desired email
5. Touch the Move icon
6. Touch Inbox

Mark email as not spam from computer:

1. Log into your Yahoo mail with your web browser
2. Select the Spam folder (select more if not visible)
3. Open the desired email
4. Select Not Spam at the top of the page

Unblock an email address in Yahoo:

1. Select the Settings icon
2. Select More Settings
3. Select Security and Privacy
4. Hover over email address and then select the Delete icon

For more information on Yahoo email Spam Filtering Settings please visit this Yahoo support page: https://help.yahoo.com/kb/fix-issues-yahoo-mail-filters-sln27270.html

or this wikiHow for a step by step guide: https://www.wikihow.com/Edit-and-Remove-Filters-on-Yahoo!-Mail


iCloudiCloud Email Process

1. Log into your account at icloud.com, select Contacts, select the Add (+) button in the sidebar and then select New Contact
2. Fill out the contact information and be sure to include their sending email address
3. Select Done

Mark email as not spam on iOS mobile device:

1. Open the Mail app
2. Open the message in the Junk folder
3. Touch the folder icon at the bottom
4. Touch the Inbox to move the message

* this procedure will work for all accounts (yahoo/gmail) that are using your Mail app

Mark email as not spam on Mac:

1. Open the Mail app
2. Find or select the desired message
3. Select the Not Junk button in the Mail toolbar or simply drag the message to the Inbox in the sidebar

For more information on iCloud Spam Filtering Settings please visit this Apple support page: https://support.apple.com/en-us/HT202315


In Conclusion

We hope that this small Spam and Whitelist management article helps to bring you resolve and understanding. If you are a business owner in need of email hosting, web hosting or eCommerce services please contact us!

Categories
Business Technology

E-commerce payment system options

One of the many steps to taking your business online is deciding how to accept payments.

Selecting an E-commerce payment system for your website can seem overwhelming to some with several questions and concerns instantly coming to mind. Where do I go? Who should I ask? Here is some helpful information that should help align your path.

Type of Website platform

Do you know what framework your website is running on? When approaching a payment processor this is one of the first questions they will ask. WordPress, Drupal, Wix, Shopify are just a few of the available website platforms. If you are using an all-in-one inclusive option like Wix or Shopify then you will be encouraged to use their easy one-click payment processing “setup wizard”. Which is great for some but will come at a cost. If you are using a framework like WordPress or Drupal then the setup is more manual. This shouldn’t come as a surprise as you have already taken the more calculated, timely and customizable approach. Ultimately you are only able to interface a payment system that can provide a secure portal or a software plugin for your websites platform.

If you are just getting going or testing the market with an idea; going the easy and quick route might be the best option. But if you are selling more substantial amounts through your website it would be wise to explore your payment processor options.

Type of Business or Industry

Some ecommerce businesses might have a more difficult time finding and securing a payment processor due to their line of business. CBD, supplement companies and many others suffer from constant regulations and display requirements to ensure continued service with their payment system. Having a great web team at your disposal, like Skynet Solutions, can help you with these requirements and keep you in compliance. Losing a way to accept money, as a business, can be a death blow. 

Types of E-commerce Payment systems and which one to choose

There are many companies offering payment processing systems that are actually resellers. Skynet Solutions is one of those, please reach our if you need help selecting a payment processor for your website. So which one do you choose? Well, depending on the above items (website platform and industry) that may have already been answered!

Integration
Its always best to integrate your payment system with your website via a software plugin API if the option is available. This provides more control options directly from your websites admin section for things like refunds or additional charges.

Rates
This is what it ultimately comes down to: What is the percentage or rate are they going to take off of the top of your profits? This is a major factor that is surprisingly overlooked! There are often times details in the specifics that can affect and change this rate depending on your volume or other circumstances. In the event you are confronted with an “easy setup wizard” will you tell them no? Or will you explore your options first?

Read our most current blog on Payment Processing for more info here: https://skynetsolutions.com/choosing-payment…or-your-business

E-Commerce payment system processors

Payment Cloud – https://paymentcloudinc.com/skynet/

Authorize.net – https://www.authorize.net

Square – https://squareup.com/us/en

Paypal – https://www.paypal.com

Stripe – https://stripe.com


Need more help?

Please give us a call or shoot us an email if you are in need of any ecommerce website support.

Categories
Digital Marketing News Support Technology

Why Do Hackers Target WordPress Websites?

As a business with an online presence, there’s a good chance that the security of both your data and your customers is one of your top priorities. And, even though you may not be convinced your website is large enough, you can as easily be the next victim as a multi-million dollar website that has countless users each day. But what makes WordPress websites a target for hackers? Continue reading to learn some of the common reasons.